I have been using a Hygain TH7DXX as my south antenna ever since I built the station in 1993. It has served me well, but some years ago the SWR on 15m started being a problem. I could still work people, but having an SWR of more than 2:1 bothered me. No amount of changing things seemed to make it better.
In November 2023, Pete W1RM posted a message that he was looking to sell a C31xr that he had recently replaced with a JK tri-bander. I jumped on it.
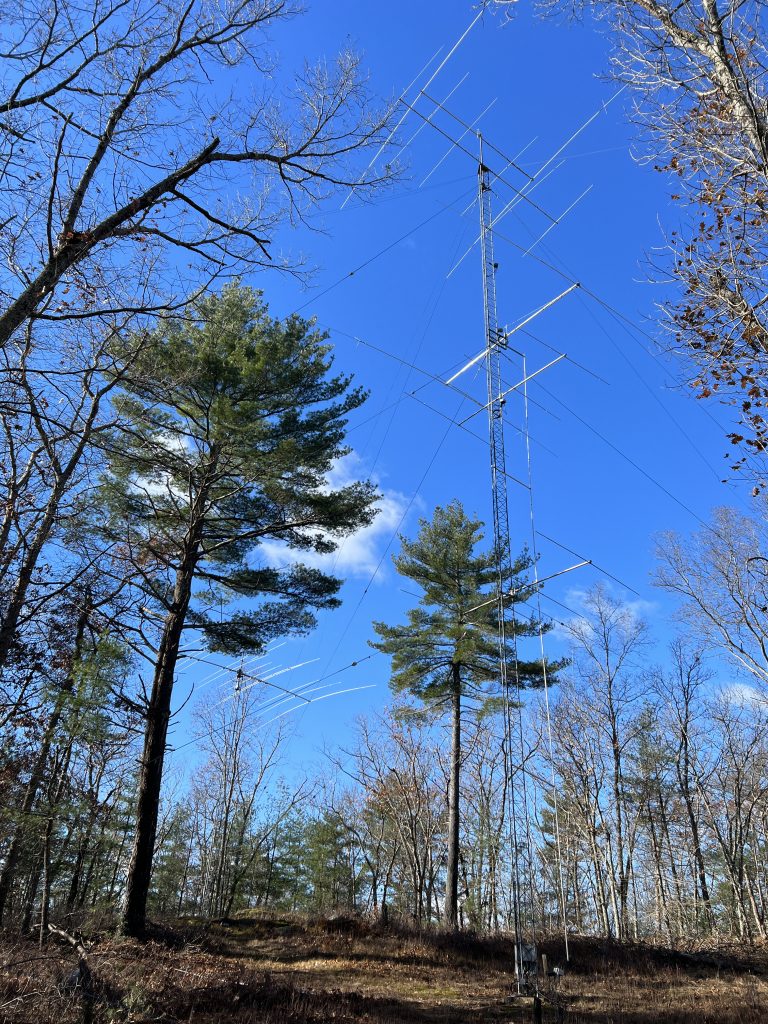
Mark KW1X and I drove down to Pete’s place in CT to pick up the antenna on November 15. You can see Pete’s new antennas in the background.
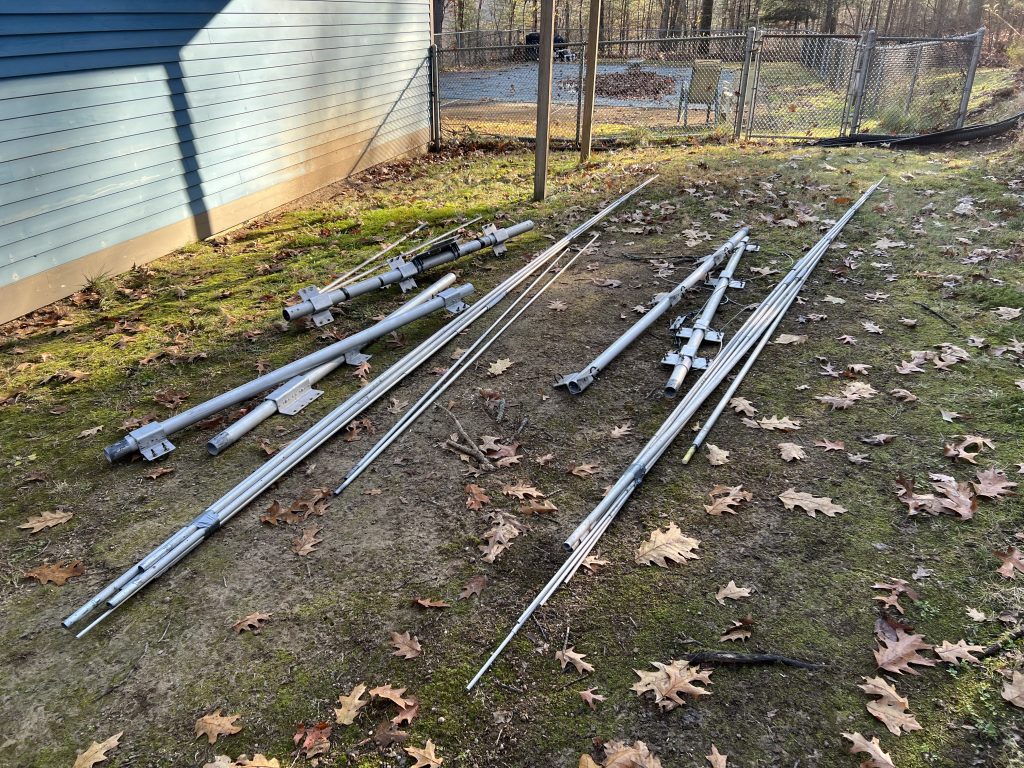
Here is the complete kit as it arrived at my place.
It was now 2 weeks before CQ WW CW and I was determined to get this antenna in the air before then. The first step was to haul all the pieces up the hill and start assembling.
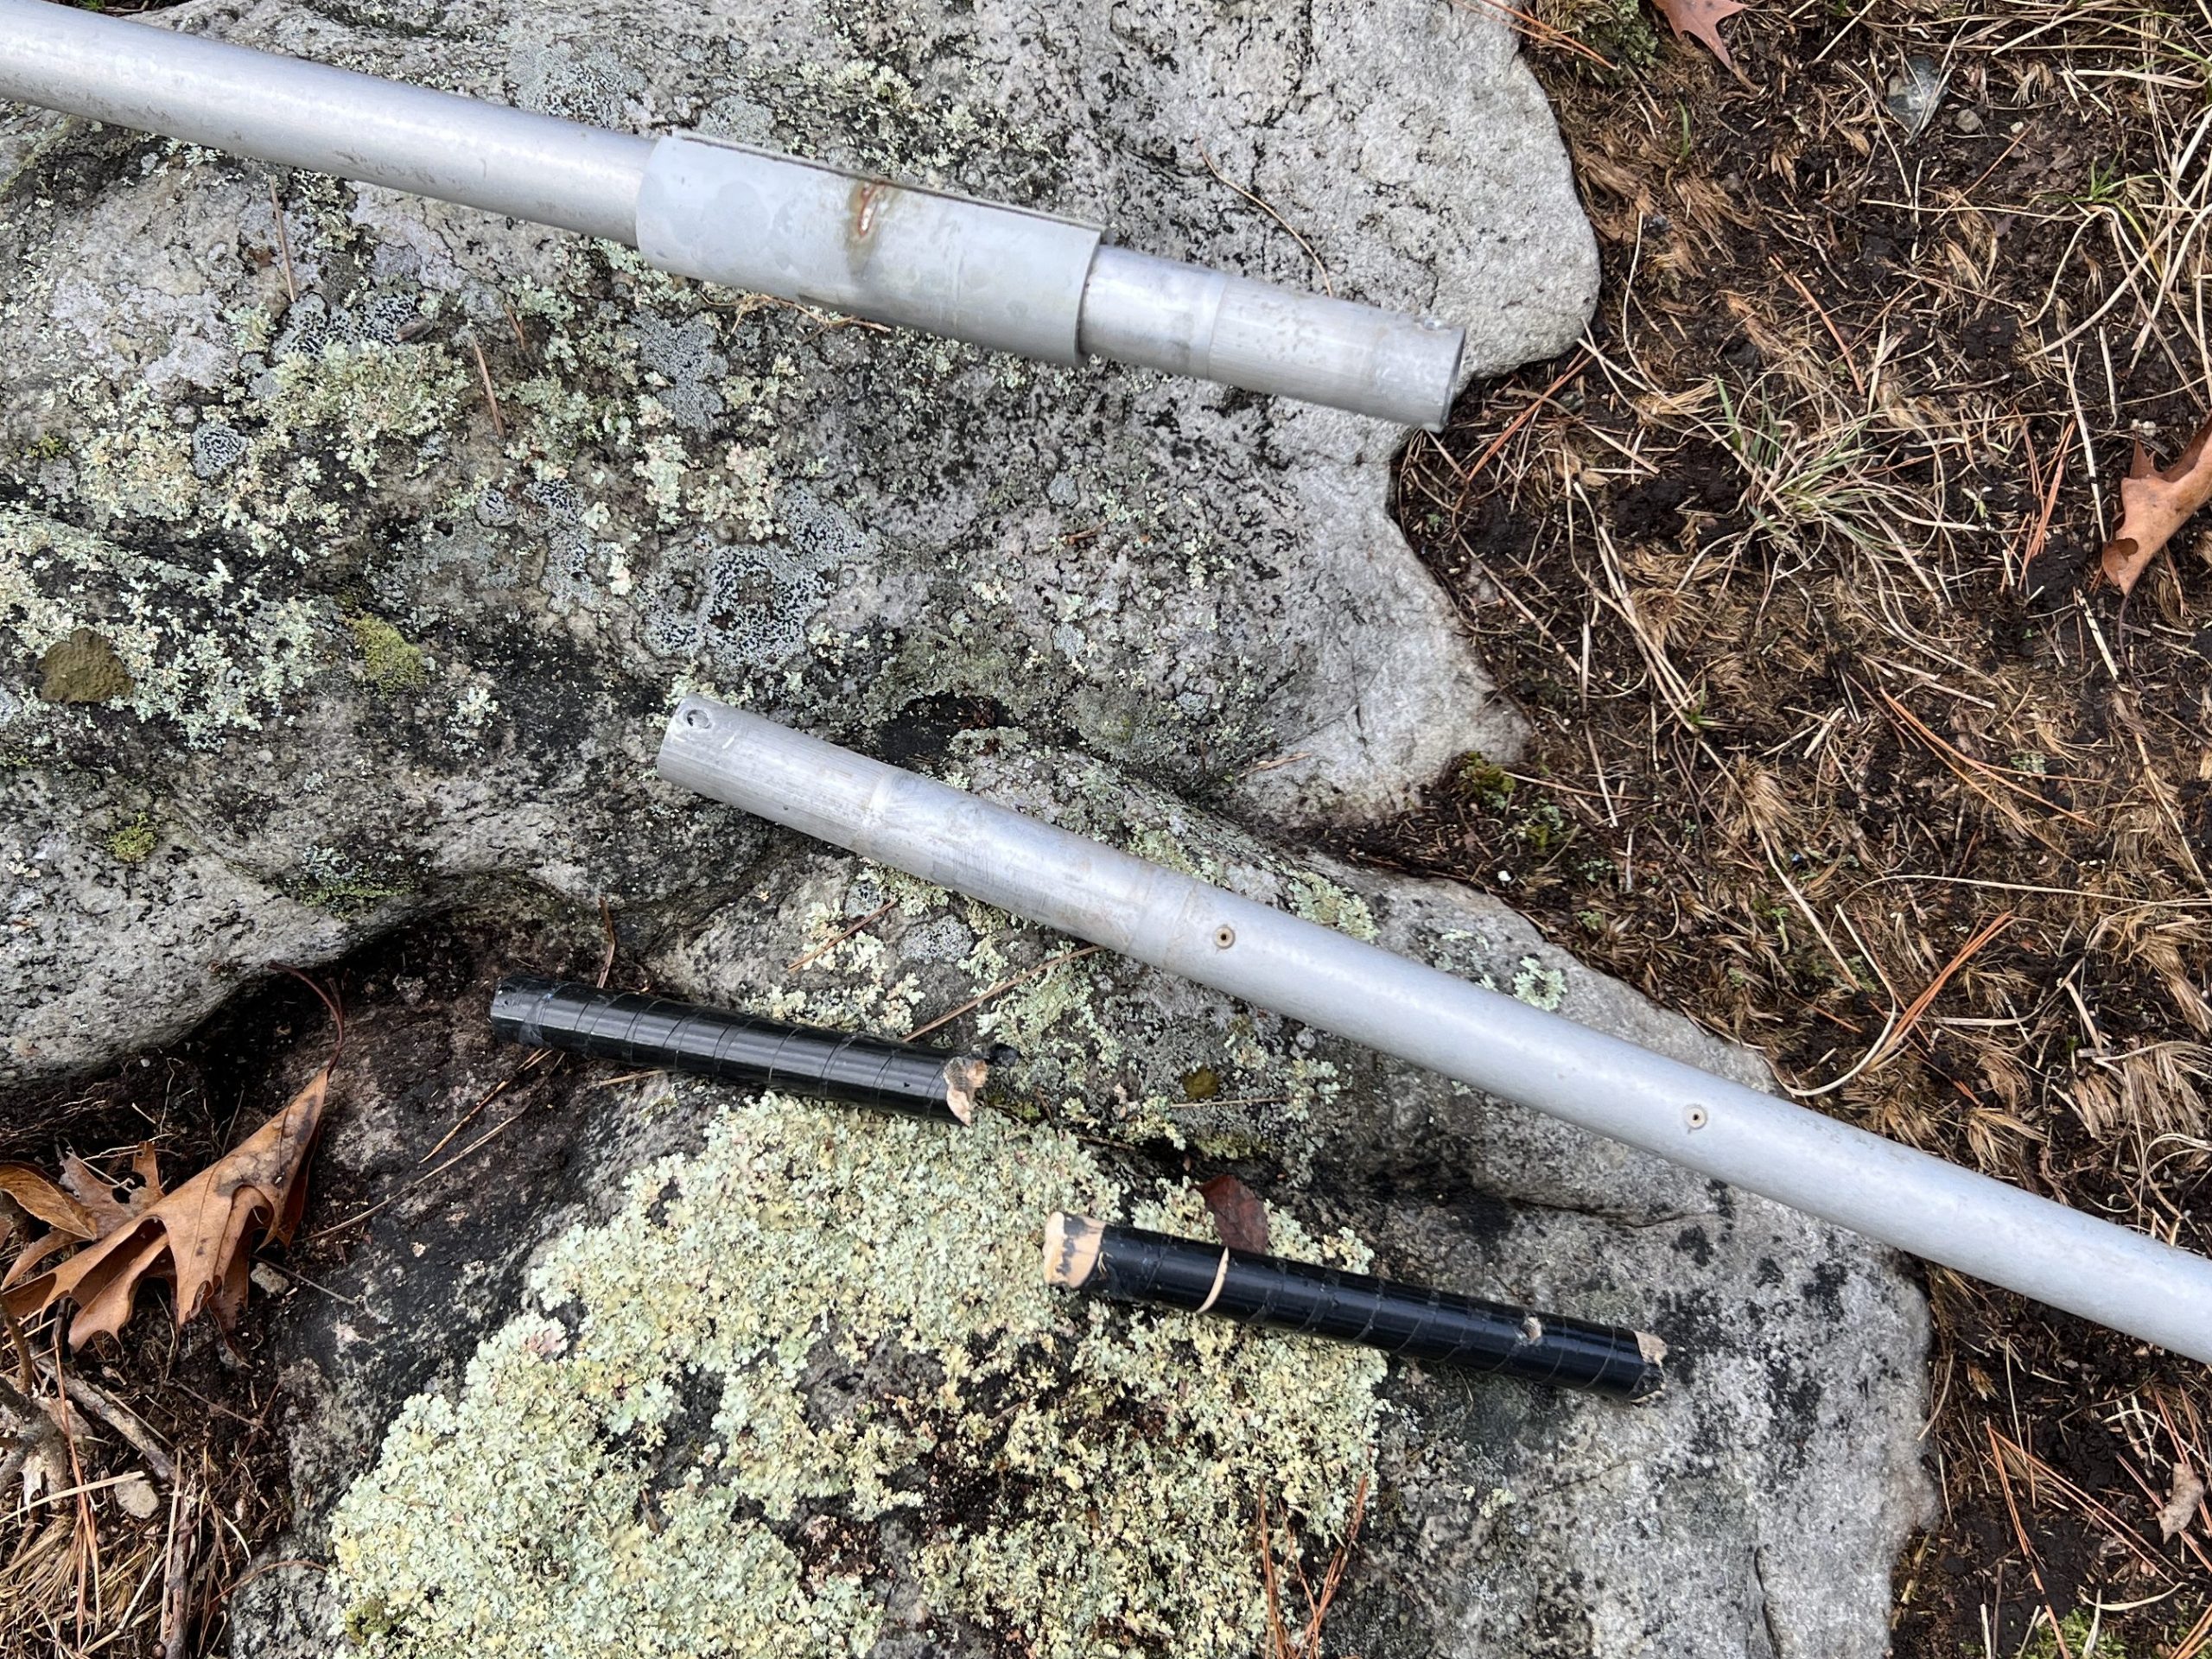
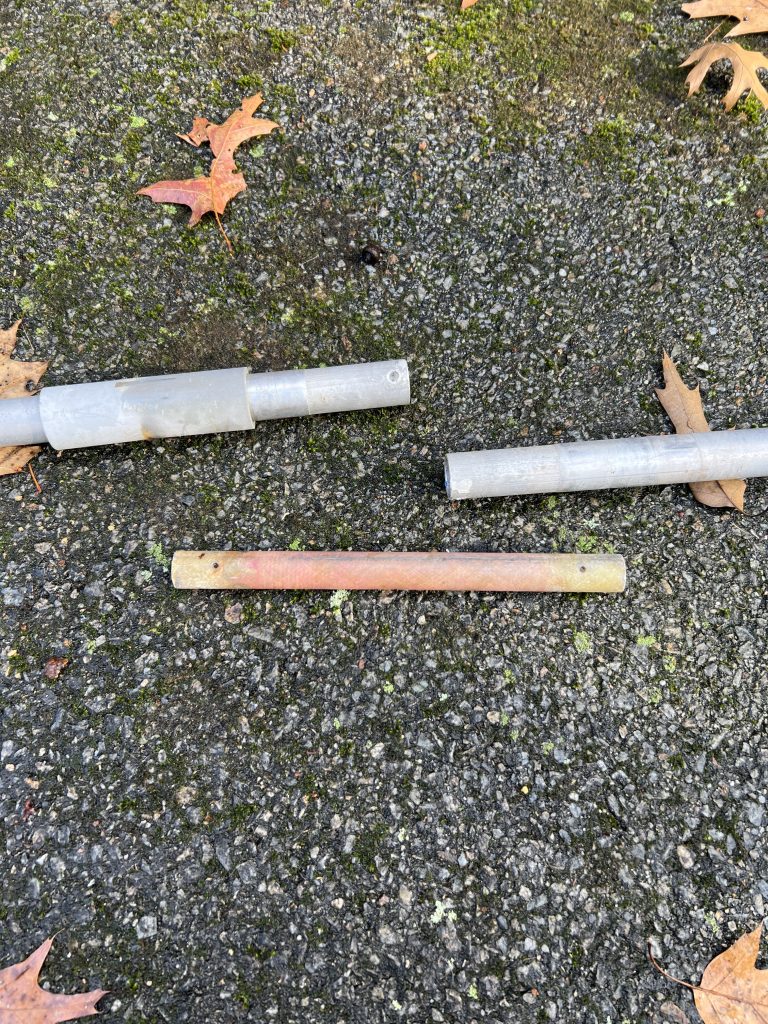
Some of the driven elements use a non-metallic spacer to isolate the element halves. As I put things together, I realized that I was missing one of them. I didn’t have much time so I tried to use a wooden dowel. It couldn’t handle the stress and quickly failed.
I had some extra loading coils left over from rebuilding the 40-2CD stack in 2022. Amazingly, one of the fiberglass rods that make up the coil was a perfect fit! It definitely had the required strength.
Antenna assembly went quickly once that disaster was averted.
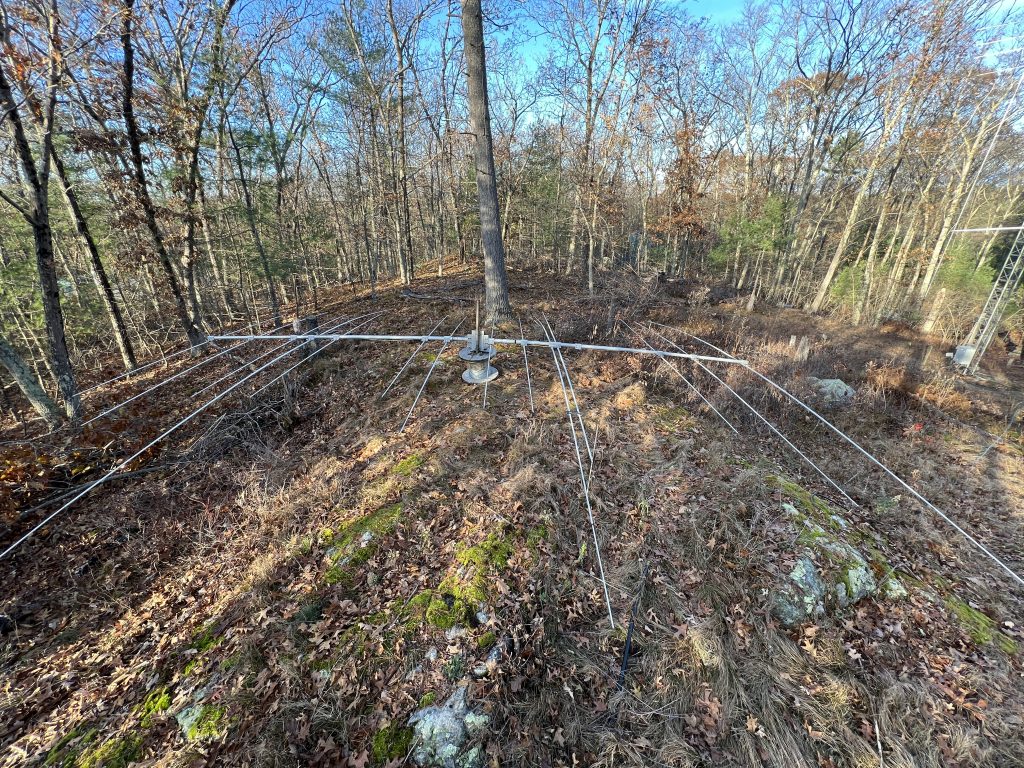
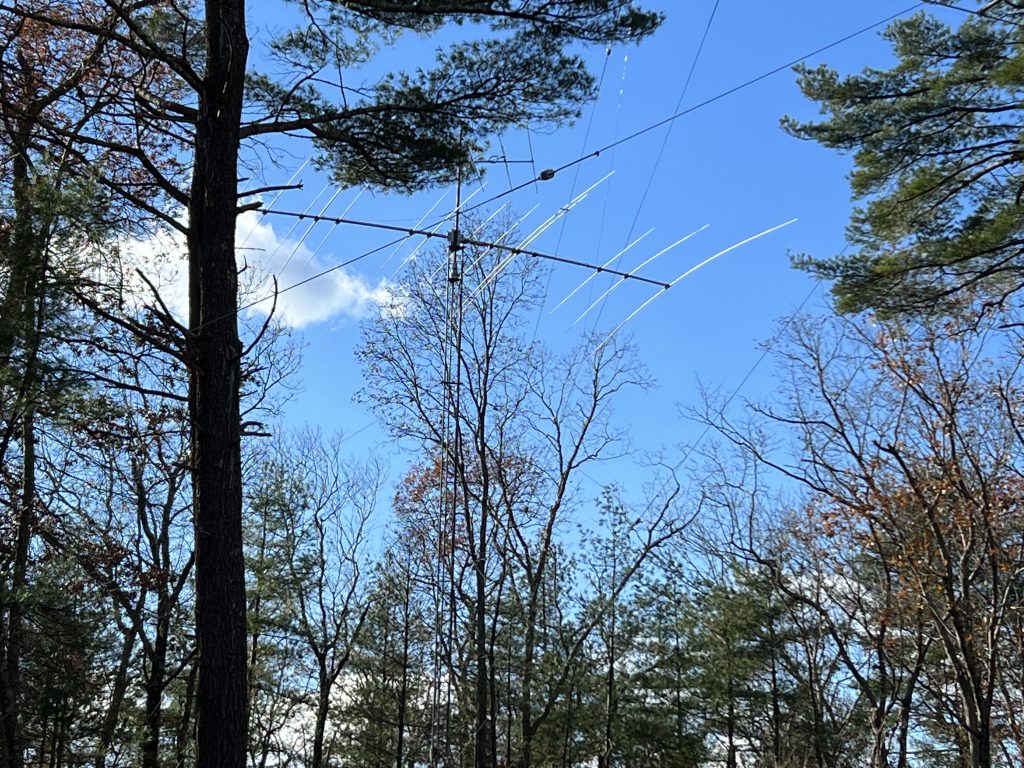
I did not truly appreciate how big this antenna was until I started to assemble it. Long boom, lots of elements (14!), and a total weight of over 85 pounds. I started to worry if it was going to bump into the trees that surrounded the tower (it did).
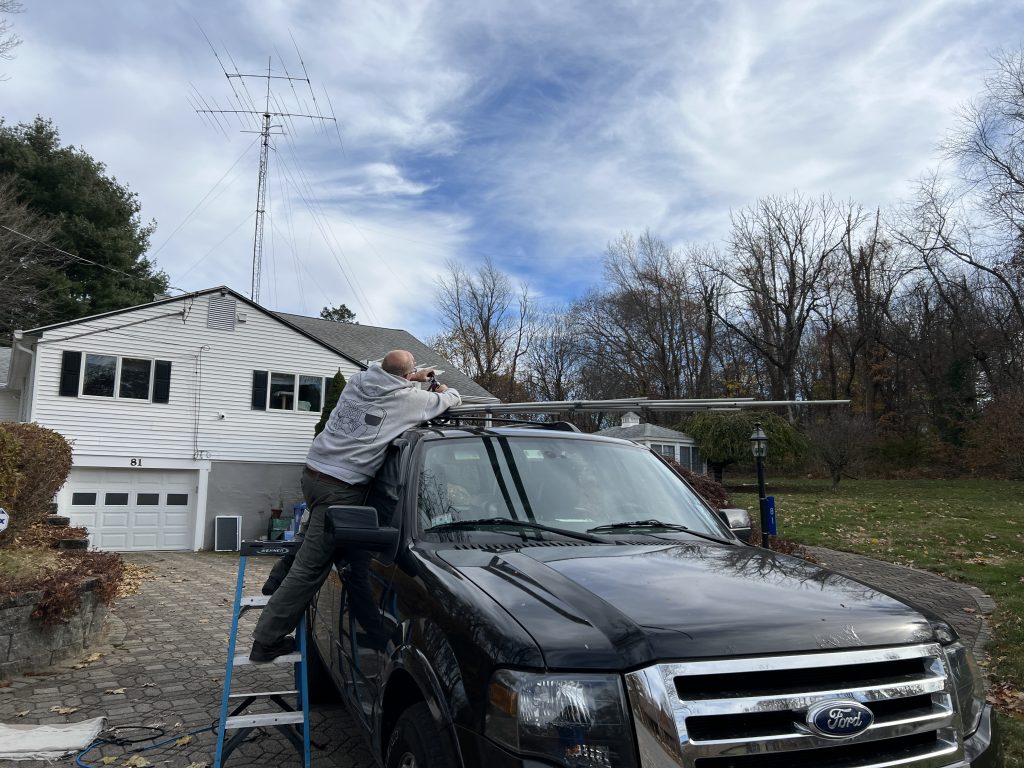
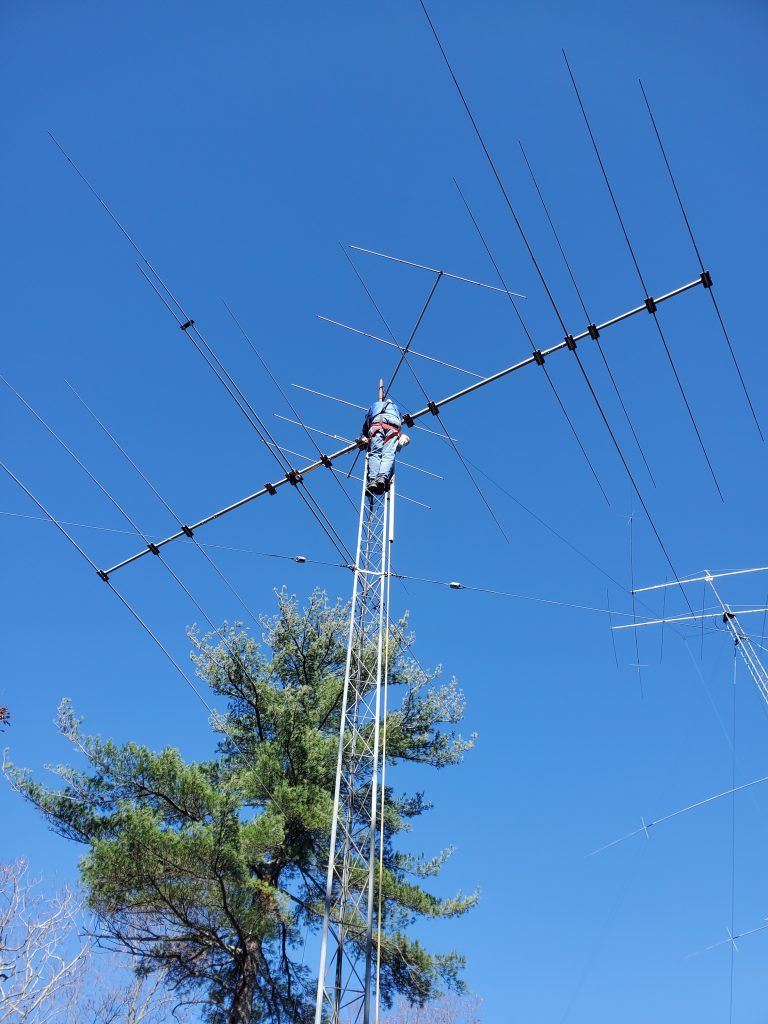
Mark KW1X and Martin AA1ON came over to help with removing the TH7 and putting up the C31. Here is the TH7 before removal.
With the help of gravity, we had no problem bringing the TH7 down the tower. This 40′ tower only has one set of guy wires at the 30′ level so it was not difficult to corkscrew the beams around the guy wires. The C31xr was heavy and it took all of Mark and Martin’s effort to pull it up.
I was happy when the U-bolts were in place and the antenna was attached to the mast.
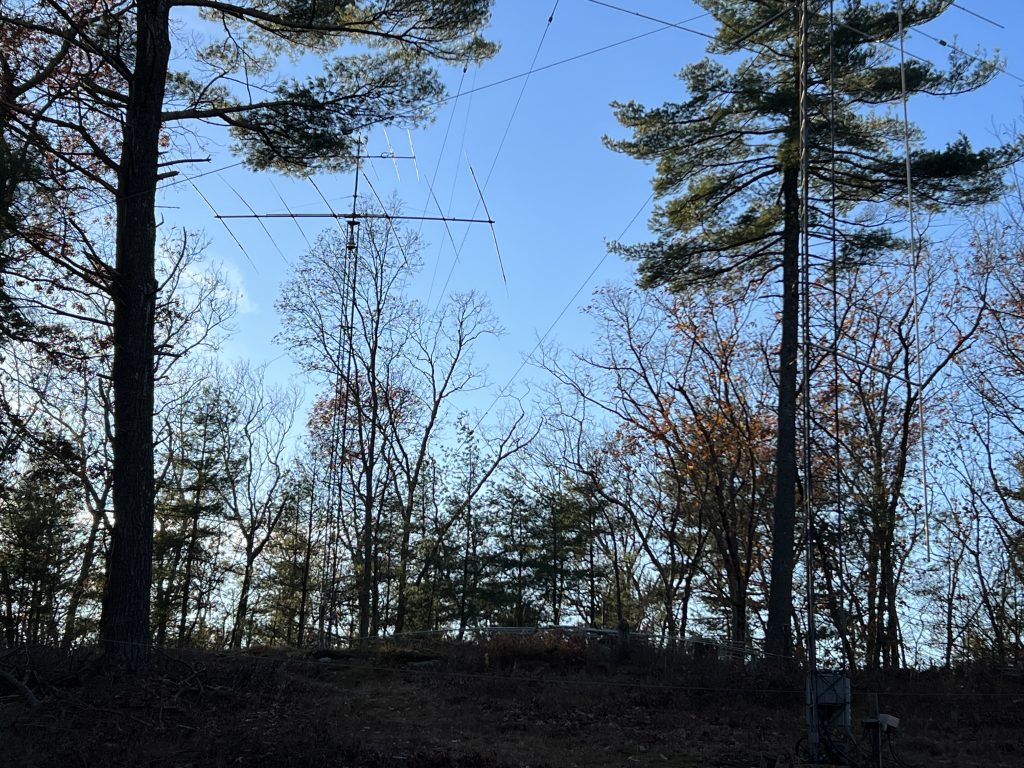
Here is the first look once I was back on the ground.
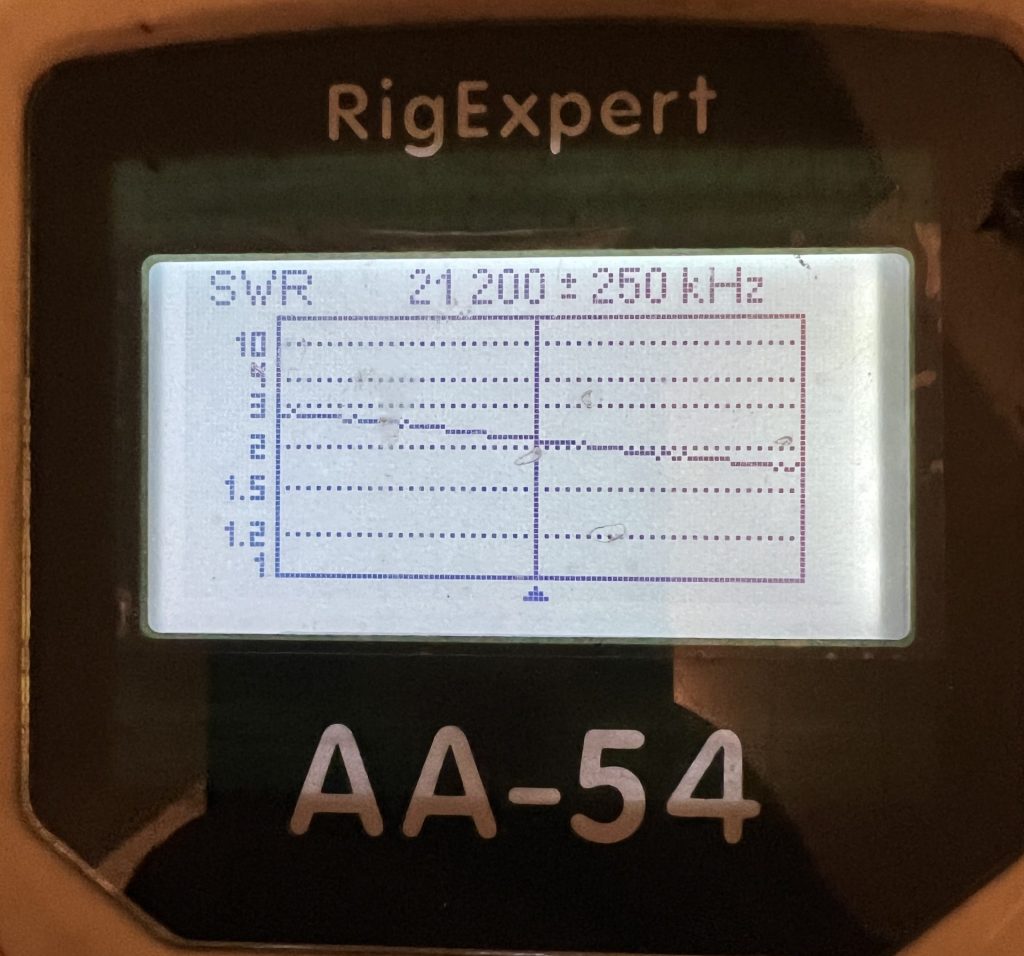
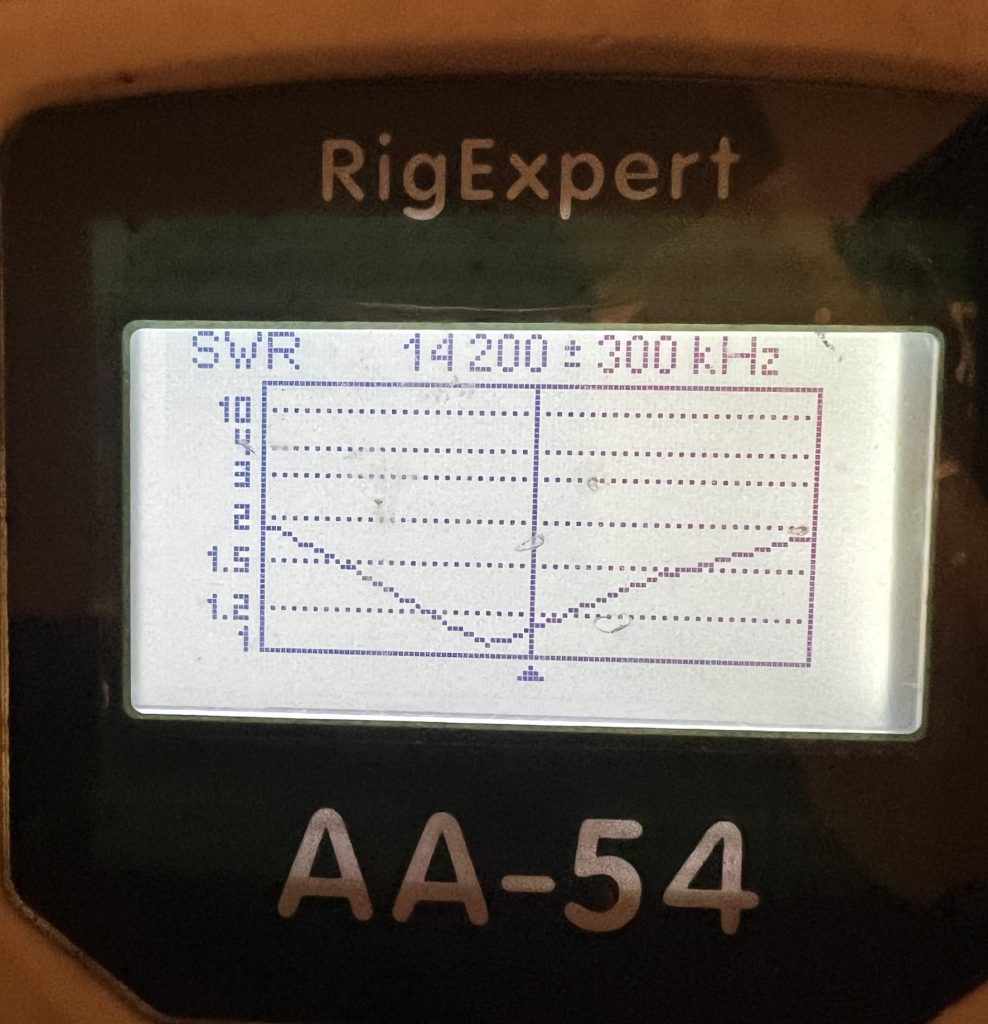
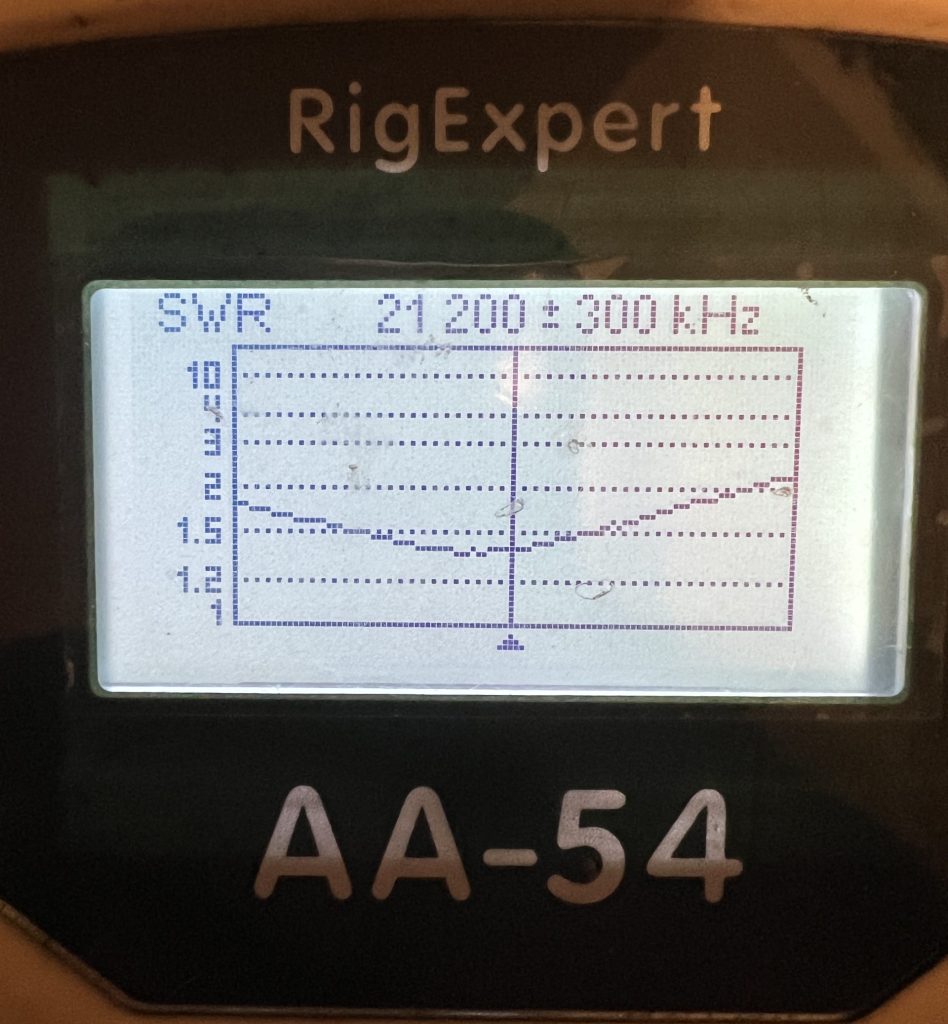
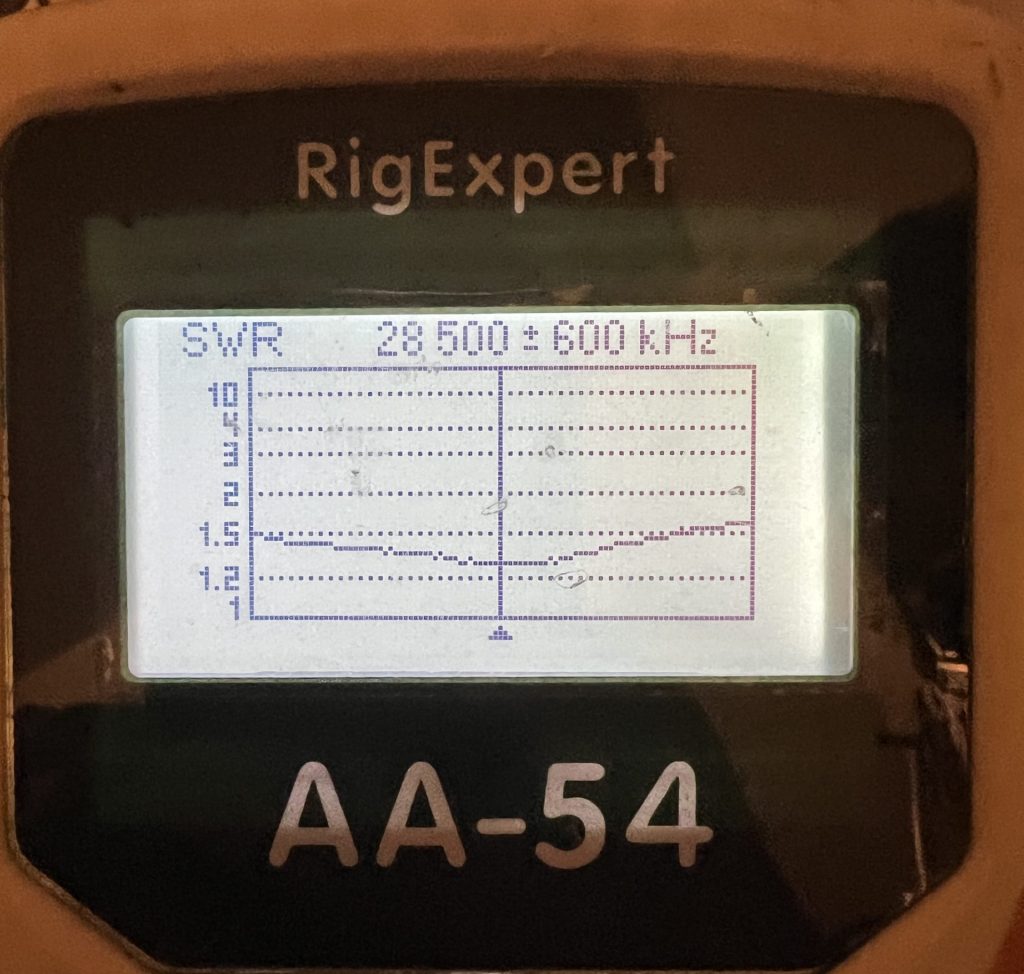
The next step was to check the SWR. Hmmm… not what I expected.
Discussion with W2GD and others who had a C31 indicated that having problems with 15m was not unusual. The first suggestion was to manipulate the loading coil.
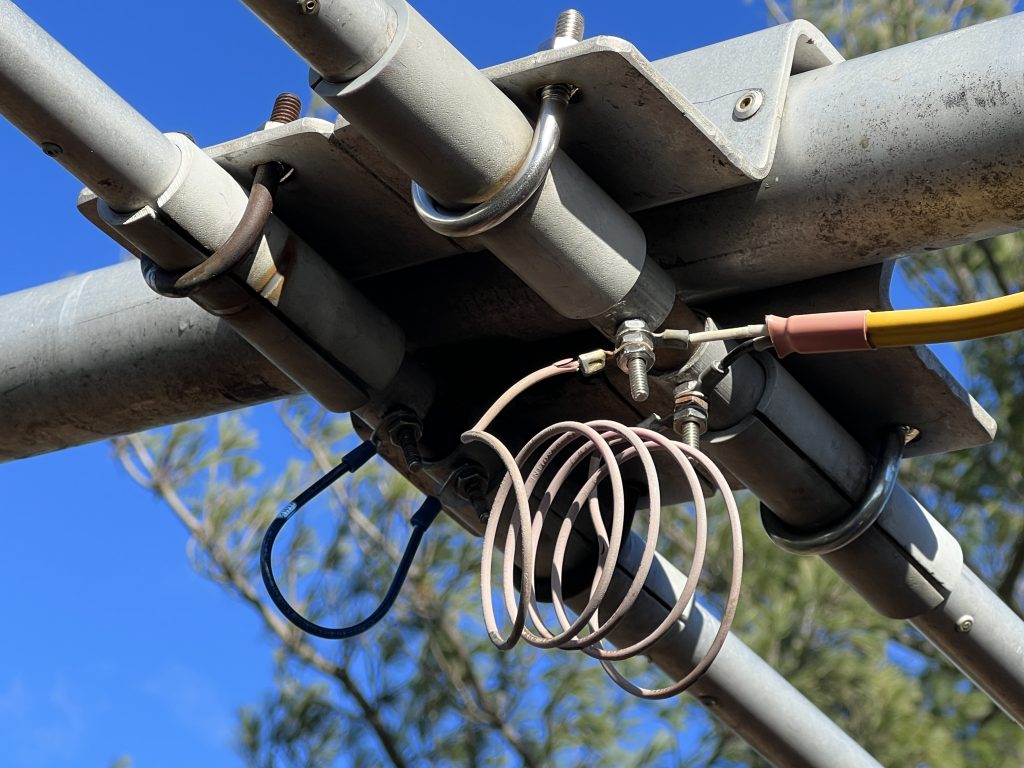
I had put the antenna up with the coil the same as it was when at W1RM. The coil had the turns taped together.
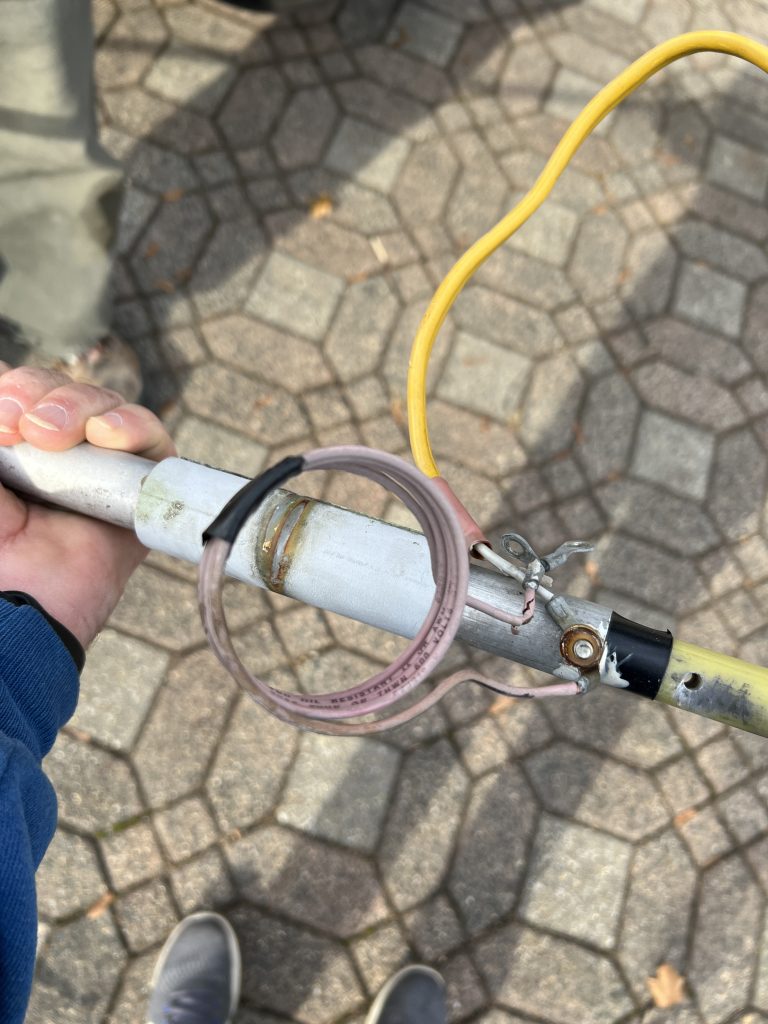
Luckily, I could just reach the coil from the tower. So on Thanksgiving morning (Thu before CQWW) I removed the tape and spread out the coil.
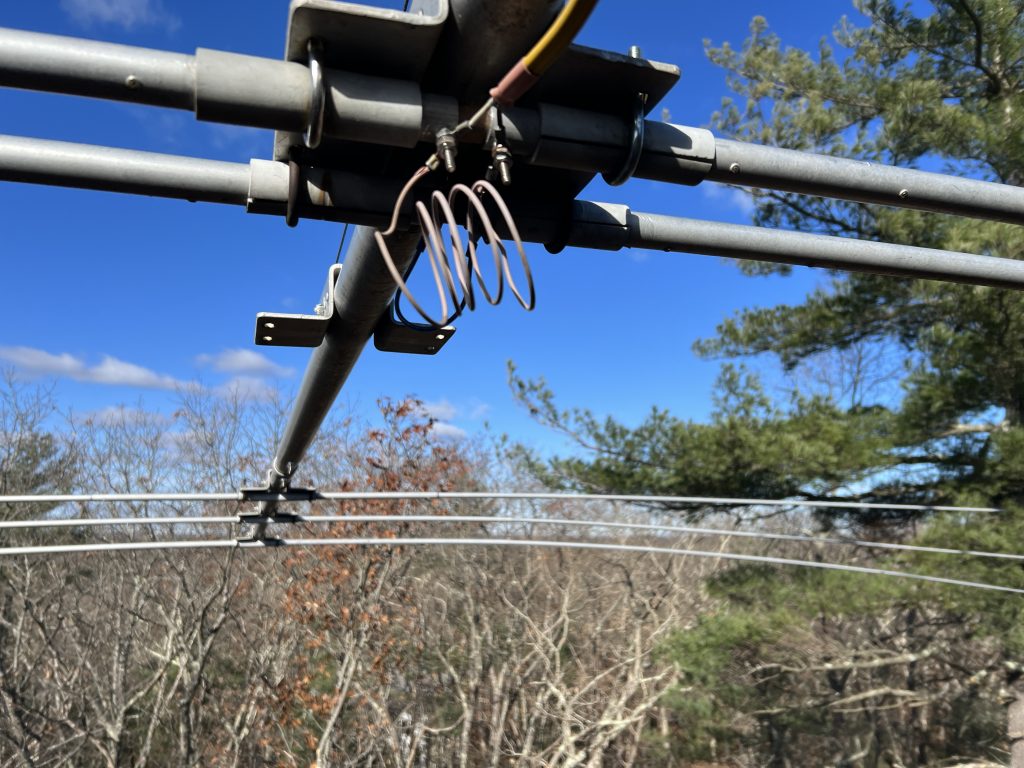
Another suggestion to move the SWR minimum on 15m down the band was to make the shorting jumper on the 15m element a bit longer. This was much more difficult to reach and involved holding the jumper in place while screwing on a small nut. I was scared I was going to drop the nut and never find it! I did manage to get it on and tightened up. You can see the jumper to the left of the coil.
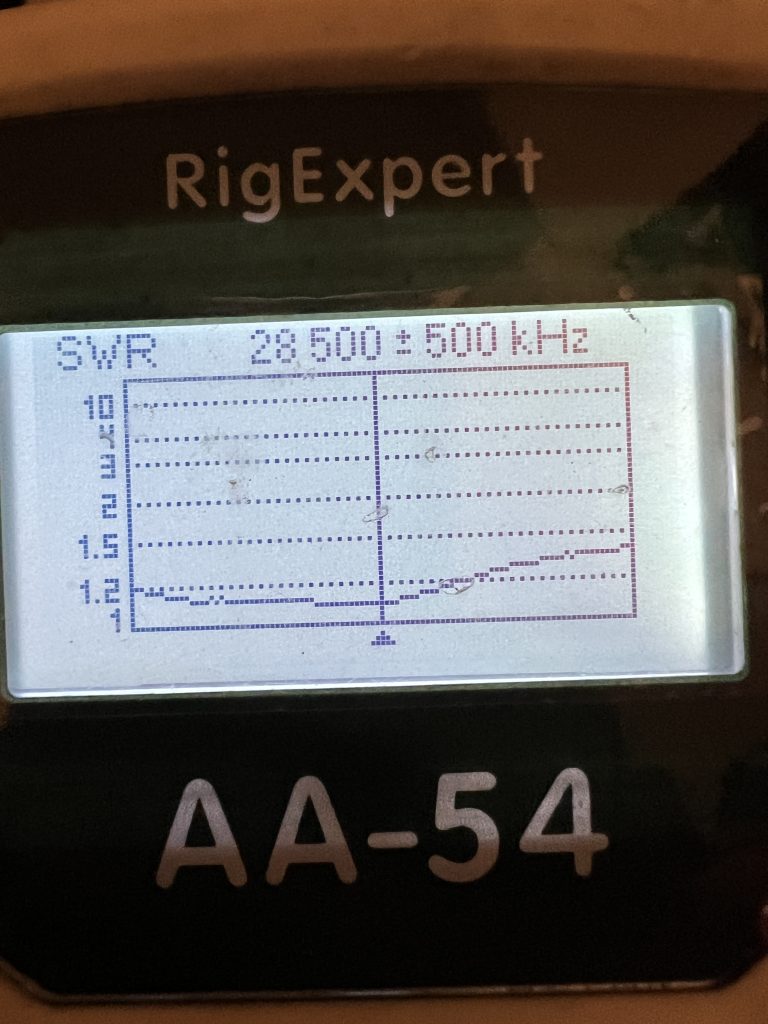
I was relieved and happy when I saw the results.
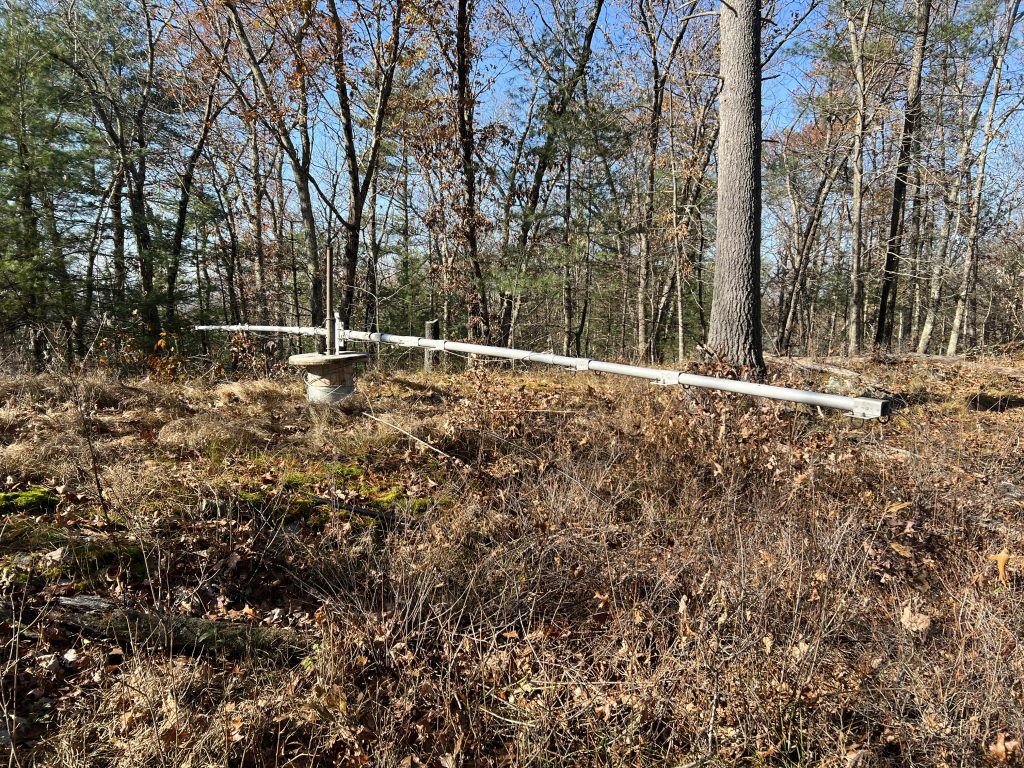
Mission accomplished! A bit of work with a rope saw cleared the tree branches that impacted the turning of the antenna and it was ready for action.
The antenna worked great during CQ WW CW. Having a 7-el 10m Yagi for a multiplier chasing antenna was nice even though it meant a lot more activity for the rotator.
One can’t really use NEC (even NEC4) to re-optimize this in a way that you could be sure that your new dimensions (keeping the spacing the same, which you can’t easily move) will yield an accurate real world result. The reason being is that NEC can’t handle elements this close together – mainly the 20m driven and 15m parasitically coupled driven element.
It’s not that it probably can’t be improved (mainly I mean the 15m SWR), but it can’t easily be done by working up a remodel via NEC like you normally would. On tribanders like this, you must keep the driven elements at least 18 inches or so from one another to keep from stressing the NEC model accuracy. That said, I believe there is an empty element bracket further back (towards the reflector) and if it was me, I’d move the 15m to that one, string a phasing line across the three driven elements and feed the 20 meter element instead. You could probably work up something a bit better that way, design it all for 50 ohm (get rid of the hairpin).
                    ARRL DX Contest, SSB - 2024

Call: K5ZD
Operator(s): K5ZD
Station: K5ZD

Class: SOUAB HP
QTH: MA
Operating Time (hrs): 40.8
OpMode: SO2R

Summary:
Band  QSOs  Mults
-------------------
  160:   64    40
   80:  231    70
   40:  446    86
   20: 1185   115
   15: 1140   113
   10: 1493   121
-------------------
Total: 4559   545  Total Score = 7,453,965  <<- Possible new W/VE record

Club: Yankee Clipper Contest Club
Comments
My third major contest effort in 4 weeks (WPX RTTY, ARRL CW, ARRL SSB). All fun with top-of-the-cycle conditions, but this one was probably the hardest.
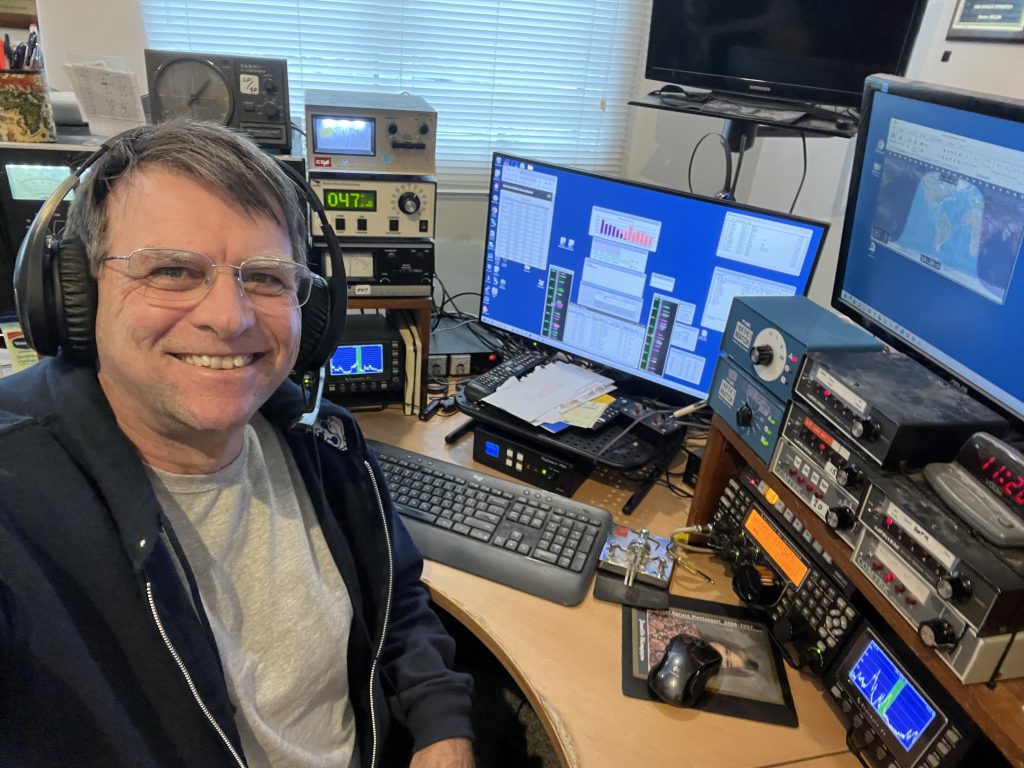
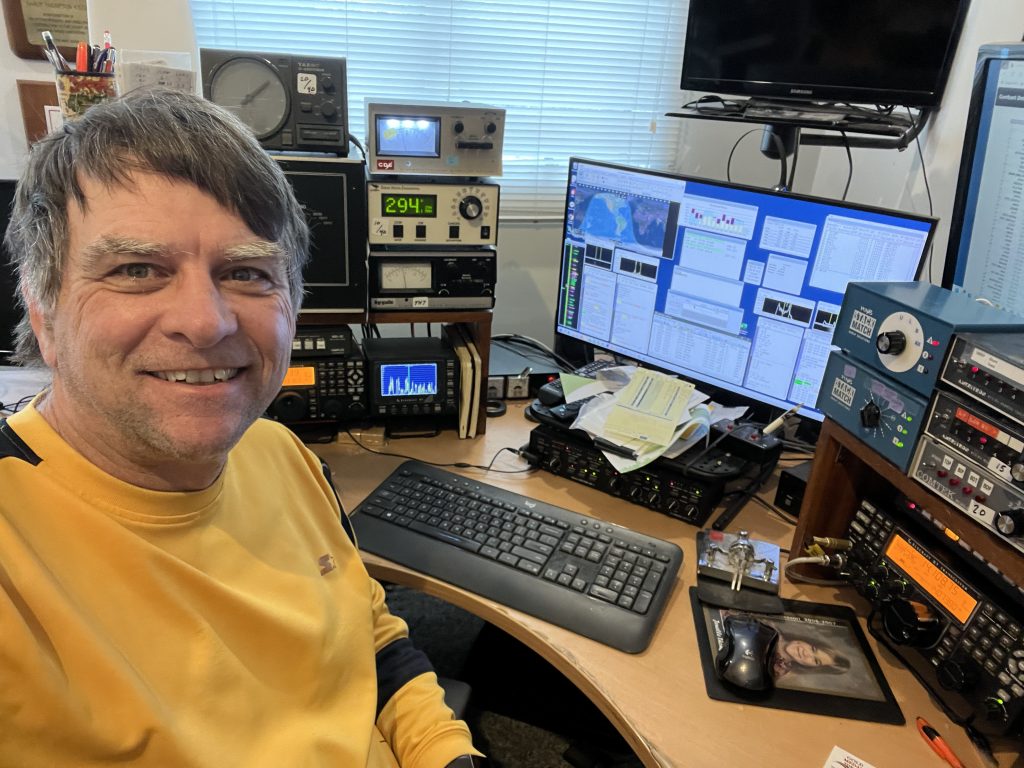
K5ZD nearing the end of the ARRL DX SSB 2024 Contest
Decent start. Even got a run frequency in the mosh pit on 40 for a while. Low bands were not as good as CW, but good enough. 160 was way down from the weekend before.
I was watching the scoreboard and seeing N5DX and N3RD disappearing into the distance. N3RD was killing it for mults and also had the QSOs.
About 0600z I started to wonder if this was fun. 20m was open. But I could hear K5GN and K5TR running Europe that I could not hear. I decided that 4 hours of sleep might be more useful. It was not a great decision as the competition used that time to put another 300+ QSOs in their logs (mostly on 40). The sleep meant I was in chase mode the rest of the way, but with a better mental attitude.
I woke up to find 20m ready to go. Then quickly to 15 for an hour before making the jump to 10. I never really felt like I was in control Saturday morning.
Always seemed to searching for a good run frequency. Finally ended up above 28.8 and got to have some enjoyable rate.
15m stayed open so late that I didn’t get much time on 20 Sat afternoon.
Managed to wedge in on 40m and ran some more stations. Not fun, but the only way to get some of the multipliers. Then went back up to 10m to find it open to JA and South America. No luck with CQs, but plenty of spots to chase.
That got me to the 24-hour point. The score was good, but I was way behind N3RD. Every year I get to this point and wish these contests were only 24 hours… Took a food break and got back on the radio.
The 0100z hour had a great opening to JA. Even got some to answer my CQs! That was fun.
Decided I should take a short nap while the Europeans were sleeping. Had trouble falling asleep, but no problem waking up when the alarm went off. Jumped around the bands chasing spots and working on the 160 multiplier. Self-spotting definitely helped get attention on 80 and 160.
I had an incredible run on 20m during the 0700z hour. Imagine being on 20m with a clear frequency, no splatter at all, and just having one or two loud Europeans at a time answer CQs. It was a dream. Even so, I knew I need another 90 minute nap so walked away from a pretty good rate (although I think it was slowing down).
I saw N3RD had stopped increasing on the scoreboard around 06z. So all those 20m QSOs enabled me to catch up. 20m was still good when I woke up so I managed to pull at 200 QSO lead. Now it was time for me to be chased. N5DX was 800 QSOs ahead so I made it a goal to not let him get to 1000 ahead. Yeah, that is a weird goal, but whatever works.
The morning was OK. Bands weren’t bad (lots of Russians in the log), but not as great as they were the day before. There is a finite amount of DX activity so you run out of people to work. Even worse when everyone goes to 10m. I felt for the single band guys on 20 and 15. They had no one to work.
Tried to run as much as I could. 20m is best around 1700z while most people are still on 10 and 15m. It was just us an Europe. And some surprise callers from new multipliers.
After a short run on 40m during the 22z hour I was left with nothing to do but chase spots in the last hour.
Other thoughts…
The weather on Friday was great. I played my first golf of the season. The weather on Saturday was rain. All the line noise disappeared. Sunday was warm and windy so line noise was back. And I kept wishing I could go play golf.
Having so many bands open does ease some of the crowding. It was still very hard to find a frequency on 20 and 15, but possible.
Being south was an advantage. You could see it in the range of signal strengths from Europe. Northern Germany was weak and the HB/I stations were very loud.
Many package pileups were won by stations in the middle and south. None of this is a bad thing, just interesting to see how propagation varies year to year and when a disturbance happens. It is disappointing that ARRL permits self-spotting, but I did it and it does help at times.
Congrats to the UK contesters and their new 1000 watt limit. And those new 2×1 calls from Italy were interesting. You never knew who was hiding behind them.
The scoreboard is awesome. Had a blast chasing N3RD and N5DX, watching K1RX coming up, and the incredible score from N6MJ at ND7K. I needed the bands to break on Sunday morning in order to catch him.
Thanks to everyone around the world who chased W/VE stations all weekend. It certainly makes it more fun for us.
                    ARRL DX Contest, CW - 2024

Call: K5ZD
Operator(s): K5ZD
Station: K5ZD

Class: SOAB HP
QTH: MA
Operating Time (hrs): 45.5
OpMode: SO2R

Summary:
Band  QSOs  Mults
-------------------
  160:  172    50
   80:  442    68
   40: 1240    80
   20: 1526    94
   15: 1369   102
   10: 1269    90
-------------------
Total: 6018   484  Total Score = 8,736,684

Club: Yankee Clipper Contest Club
Comments
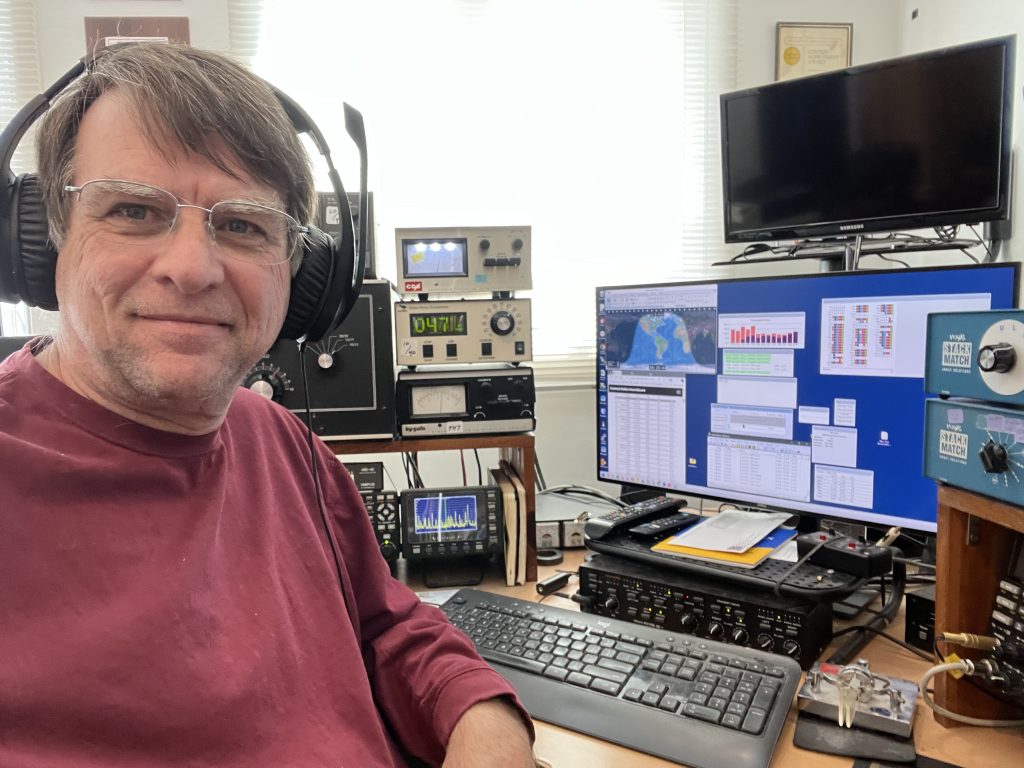
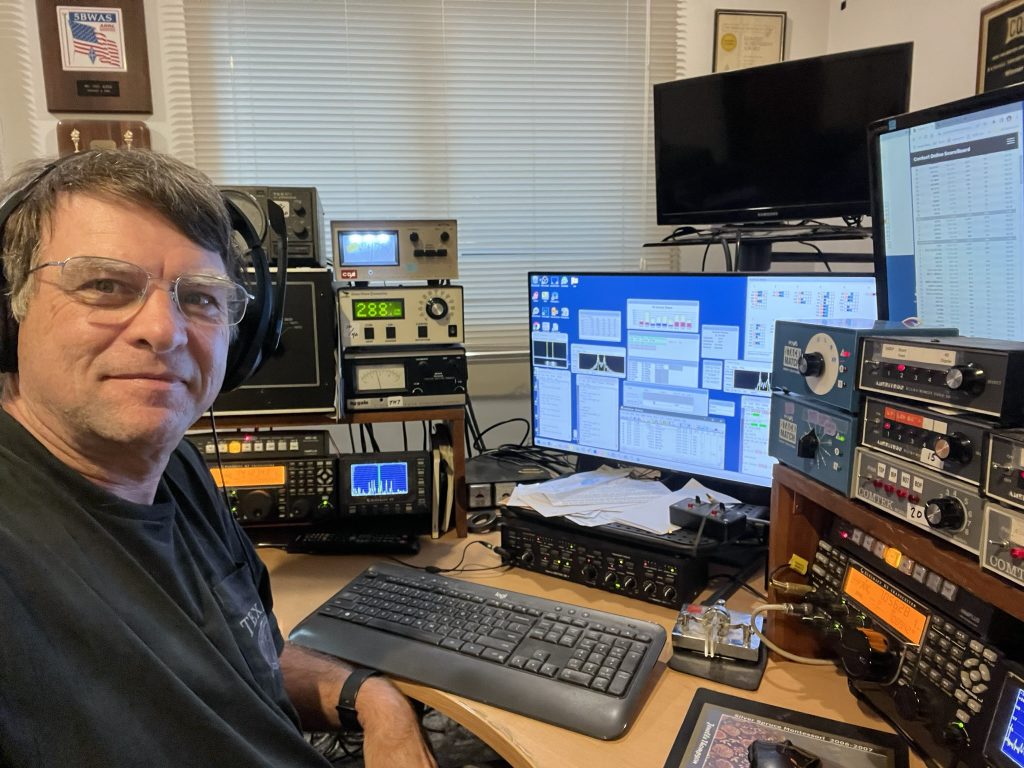
K5ZD near the end of ARRL DX CW 2024.
What a contest. What fantastic conditions. Especially over the pole. So many Russians!
We used to count the number of hours over 100 as a measure of contest success. This time I only had one hour under 100 in the first 24. Wow!
I turned on the scoreboard about 3 hours in feeling like I had a good start. Only to find N5DX and WA1Z already way ahead of me. A trend that would only continue. Even during 3 consecutive hours on Satruday morning with over 200 QSOs per hour N5DX just kept pulling away. WA1Z disappeared sometime on Saturday. That left me competing with N6MJ at ND7K. What? A W7 is keeping up with W1 in a DX contest?! Conditions must really be good.
I must have a hardware problem in my computer. It crashed around 17z the first morning. The MK2R+ software locks up hard and the only solution is to turn off the computer and restart. It happened again on Sunday at about the same time and I almost quit, but had too much invested in the contest at that point to give up.
160 was good the first night, but even better the second with no noise at all. I worked a number of 100W Europeans and even a few QRP.
The first night it seemed like 20 never closed. Loud Russians and then loud Europeans, with Japan mixed in the whole time. I missed a lot of 40m time because 20 was so good. The second night had the 20m opening, but not as good. And 40 was great at Eu sunrise so was able to get caught up.
The high bands were awesome on the first day. Just great the second. There was a period late morning on Sunday where I just couldn’t seem to get anything going. All while watching N5DX just keep pulling away.
Conditions to Asia the last 2 hours of the contest were great. I was even able to call CQ on 15 and get responses. A big help in my last-hour push to get to 6000 QSOs (far and away my personal best in a DX contest).
Mults were a challenge. It was hard to find time to S&P, and even when you did it was just stations sending a power and then dit dit. Callsigns seem to be optional in today’s DX cluster-powered contesting world. I have done assisted so much that I have forgotten the discipline of having to tune while running.
Lots of 6 band QSOs tell the story about how good all of the bands were.
Did not get out of the chair except for more than a few minutes in the first 26 hours. Then took a break to eat, then a short nap, then another short nap. Most I have operated as a single op in a number of years.
Unable to do 2BSIQ. Tried it for about 15 minutes on Sunday morning and just couldn’t Keep up. So this was almost all old school SO2R.
I did record the contest and there were some great rate and SO2R experiences. Unfortunately, the computer crash on Saturday did not continue the recording when I restarted. So missed a lot of the contest. Very sad since this one might be worth listening to during the next sunspot low.
Thanks to all the DX that spent their weekend working USA stations. Now to get ready for SSB in 2 weeks!
I was not planning to make a real effort in this contest. I wanted to save my BIC time for next weekend in ARRL CW (a WRTC qualifying event). Since I blew up an amp in CQ WW RTTY last fall, I thought it might be good just to do low power. That would also keep me from operating too much.
Started the contest 15 minutes late. Was CQing on 40 while trying to work the other bands. It did not start out great but was having fun. Hard not to have fun when you combine contesting, DX, and some great sunspot numbers. 40 was great all evening. Even 80 had louEUEu signals. But, I couldn’t stay awake and decided sleep was more valuable.
Woke up before the alarm on Saturday morning so got on the air. I was messing around on 20m and when I went to 15m (well before sunrise) it was already hopping. Great rates doing 2 bands on Saturday morning.
The weather on Saturday was great outside. Hated to spend it on the radio. Ran some errands, then got back on. Ran some new hardline out to the tower, then got back on. Went for my daily walk, then got back on. Watched a movie, then got back on.
Sunday conditions seemed slightly less good and the rates were down. While activity was good, it wasn’t infinite. I took some more breaks to do stuff. Then ended early to set up for Super Bowl watching.
Never imagined the score could get over 5 million. Amazing how points start to accelerate as the mult total grows.
Low power was way more fun than I expected. Didn’t seem to have much trouble being heard (except for polar paths to Japan and UA9/0).
Did an experiment by turning off the AGC on the K3. Tough on the ears at times, but it sure improved the copying of stations. The combination of Writelog along with 2 Tone and MMTTY was a winner. Almost always one of the two decoders would be clean copy.
The level of operating proficiency was the best ever. Calling stations sent their call the right amount of times. The exchanges were snappy. People seemed to be copying the numbers well. Really added to the fun! Running on 2 bands is like a fast paced video game as you switch focus back and forth.
Thanks to everyone who handed out QSOs. Gotta enjoy these high sunspot years!
                    CQ Worldwide DX Contest, CW - 2023

Call: K5ZD
Operator(s): K5ZD
Station: K5ZD

Class: SOAB HP
QTH: MA
Operating Time (hrs): 44
OpMode: SO2R

Summary:
 Band  QSOs  Zones  Countries
------------------------------
  160:  156    15       60
   80:  526    24       99
   40: 1148    31      120
   20: 1089    38      130
   15: 1099    37      133
   10: 1053    34      129
------------------------------
Total: 5071   179      671  Total Score = 12,473,750

Club: Yankee Clipper Contest Club
Comments
Nothing like a high solar flux to bring out the fun. The best part was that it didn’t mess up the low bands. I never expected 60 countries on 160.
Bought a used C31xr to replace the TH7 the week before the contest. Was installed last weekend with help from KW1X and AA1ON. A great addition to the station.
Some intermittent problem on 40m. Transmit was ok, but on receive it would drop 10-20db in signal levels at times. I had to transmit to restore receiving. Very annoying. Seemed to get worse as I transmitted more. Probably one of my homemade hardline connectors.
Replaced one of the encoders in my K3 during the week. It had broken during the V4 trip. When I tried to make my first QSO of the contest I hit the key and the power went out. Quickly tracked it down to a loose connection at the power supply (another thing that made the trip to V4 and back). So started the contest 2 minutes late.
Surprise band the first night was 160. It was very quiet here. Must have been quiet in Europe as I was having no trouble calling stations and having them come right back. Even got some answers to CQs. The second night I could still hear Eu well, but they couldn’t hear me as easily.
Meant to take a short 20-minute nap on Sat morning. Woke up wide awake an hour later. The alarm on the iPad showed it was going, but I didn’t hear any sound. (It was playing into my earbuds sitting across the room.)
Immediately jumped on the radio and found 20 already going. Oversleeping would have been a disaster.
Conditions on Sat were okay, just one band lower than expected. And by the time 15m winds down, everyone in EU has left 20 to go to the low bands.
Took another 2 hour nap Sunday morning. More of a proactive measure since I didn’t really feel that tired. One of the ‘benefits’ of old age is that I don’t seem to need sleep as much. When I woke up Sunday morning and sat down on 40m, could not believe how loud the JA signals were. Several were 20 over with very little flutter.
I pushed down to 20m early on Sunday to bring the totals up. Which worked out well and meant I was ready when 15 opened to Asia.
The opening to Japan/Asia on Sunday evening was the best I have ever heard from here. The JA signals on 20 were great. Then got really good on 15. Even worked a few on 10.
Some nasty pileups. A few people seemed to be over-aggressive in their calling. By that I mean I kept hearing the same guys be annoying. Also noticed a lot of times when a guy would call and then not hear the DX come back to them. And not just once. You need to be able to recognize your own call coming back through the noise.
Did work 4W8X on 5 bands. Amazed to hear them on 80. Even more amazed they could hear me.
Loved watching the scoreboard. I use the mode where it shows all single ops regardless of Assisted or not. My goal on Saturday afternoon was to catch up with the multiplier total of K1ZZ. And to not let N5DX get more than 1000 QSOs ahead of me. I think I only finished 975 behind.
I am going to have to learn this 2BSIQ thing. Especially with multiple bands so open at the same time. I did manage to put together one 2BSIQ period of about 40 minutes on Sat morning that showed the potential.
Great fun. Thanks to everyone who gets on for the best weekend of DXing in the year.
K5ZD (op. K5ZD) in the Single Operator Category, High Power. Read the post-contest writeup.
This was an SO2R operation. The audio is the same as heard by the operator. When headphones are ‘split’, the left channel is from the left side radio and the right channel is from the right side radio. The sidetone audio is very low so you may not always be able to hear what is being sent.
                   ARRL Sweepstakes Contest, CW - 2023

Call: K5ZD
Operator(s): K5ZD
Station: K5ZD

Class: Single Op HP
QTH: MA
Operating Time (hrs): 22
OpMode: SO2R

Summary:
Band  QSOs
------------
  160:    0
   80:  104
   40:  417
   20:  384
   15:  136
   10:   95
------------
Total: 1136  Sections = 85  Total Score = 193,120

Club: Yankee Clipper Contest Club
Comments
Worst. Sunday. Ever.
The first 6-7 hours of the contest was fun. I love the long exchange and trying to interleave QSOs on the second radio.
The hard sections seemed to be easy to find. I got the sweep when VA1RST called in on 80m at 0630z. (I worked at least 2 of every section except PE/VY2TT and VI/KP2M.)
Sunday was awful. So many unanswered CQs. Rate never happened during the morning so the afternoon, with the added solar storm, was even worse.
I would have quit but wanted to make my goal of 1000 QSOs. Did it. Then activity started to improve so I pushed a little further. Finally, I couldn’t take it anymore and ended an hour early.
Was keeping an eye on AA3B and N2NT on the scoreboard. They at least validated that there was no rate. We all marched along in lockstep. 🙁
Thanks to everyone who got on. It is always difficult the weekend immediately after a great high sunspot CQ WW.
This was a casual effort that turned serious. Didn’t do the normal sleep and food prep for a big effort. Was looking forward to the contest, but didn’t expect to spend full-time. Conditions on Friday night and Saturday were great. Lots of good openings and rates. Only slept 2 hours Friday night and 30 minute break for lunch. I would have been very happy if it ended after 24 hours.
Line at 24 hours: 2166 QSOs, 183 St, 95 Zn, 276 Cty for 2,958,914 points
The second 24 hours were a bit of a slog. Not helped when one of my amplifiers failed about 1305z. The power output went from 1400W to 2W. After spending an hour operating with one radio and thinking about quitting, I decided to pull a spare amp out of the closet and keep going. I was back in full SO2R mode by 1500z.
Was entertaining to watch the race between K1LZ and AA3B on the online scoreboard. They really piled up the multipliers. At one point on Saturday, I was more than 160 mults behind AA3B. I made it my goal on Sunday to close the gap to less than 100. You would think available mults are somewhat fixed, and I should be able to find some that he found using the cluster. But, no matter what I did, I never made it to under 100 mults behind. It was good motivation to keep me tuning the bands. Running on two bands very much limits the ability to tune around. You have to hope the mults call in.
The rebuilt TH7 now has an SWR problem on 10m. The amp didn’t seem to care and I was able to work stations to the south.
Nice JA run on 15m Saturday evening. Almost all right at the noise level. It was interesting to see how the bands opened in the morning. 20m was open well before sunrise but didn’t last long after due to absorption. 15m was the daytime money band. 10m was good on Saturday morning, but not so much on Sunday.
Spent time checking which antenna was best. For 10m, it seemed like the high antenna at 100′ was always better than the low stack or all 3. On 15 and 20 the stack was always best.
Spent a lot of time chasing missing states. Thought I was going to miss RI on 20m, but found NC1CC with an hour to go. Was missing OR on 20m until N7DB called in during the last hour. Didn’t hear a MT station until late Sunday and then got K7QA on 2 bands. Only worked one station in DE. No contact with VT although I heard N1IBM work someone.
Always a fun contest. The RTTY crowd is very proficient these days. Except for those few guys who still insist on sending everything 3 times. The biggest impediment to rate is my ability to type. I would mess up a letter and the station I was working would repeat their call multiple times. My bad.